Welcome to this month’s tech review blog, we are testing the xTool D1 Pro 20W.
The xTool D1 Pro was kindly supplied by xTool, part of the Makeblock company, founded by CEO Jasen Wang in 2013.
Mr Jasen Wang is an engineer and robotic designer with a master’s degree in aircraft design. He’s driven to empower makers, educators and the development of future engineers. He’s determined to bring technology and design into schools, providing accessibility to children at an early age. I would like to thank Jasen personally for providing the xTool D1 Pro for review.
Introduction
The xTool D1 Pro is a laser diode machine, designed for engraving and cutting a wide range of materials including but not limited to:
- Leather
- Wood
- Stainless Steel
- Rubber
- Slate
- Rock
- Metal Business Cards
- Silicone
- Acrylic
- Paper
- Cardboard
- Food
A truly versatile laser machine that can adapt to include a rotary jig, opening up the possibility to engrave cylindrical items.
Unboxing xTool D1 20W Laser
The box 76 x 16 x 40cm (approx) is unassuming, that is until you open the box. There are two black boxes with green (shiny) xTool logos.
These boxes contain the following:
- Sample Materials
- Manuals and Making Booklets
Lifting off the top layer of foam reveals the stunning red and gold colour of the xTool D1 Pro. The quality of the aluminium extrusions are first class, lifting the parts from the snug-fitting foam, you can immediately feel that these part are designed to last.
 xTool D1 Pro 20W Box Contents
- xTool Red Frame Sections x 4
- Gold Gantry
- Stepper Motor Shaft
- Risers/Feet Red x 8
- xTool D1 Pro 20W Diode Laser
- Safety Glasses
- Material Pack
- Quick Start Guide, Instructions and Brochure
- Power Adapter and Cable
- USB Cable
- Motor Cable
- Cable Ties
- Limit Switch Connection Cable
- Aluminium Sheet A4
Tool Box Contents
- TF Card
- Stepper Shaft Coupling
- Double Sided Screwdriver
- Hex Keys x 3
- M4 Screws
- Air Nozzle Connector Components
Assembly
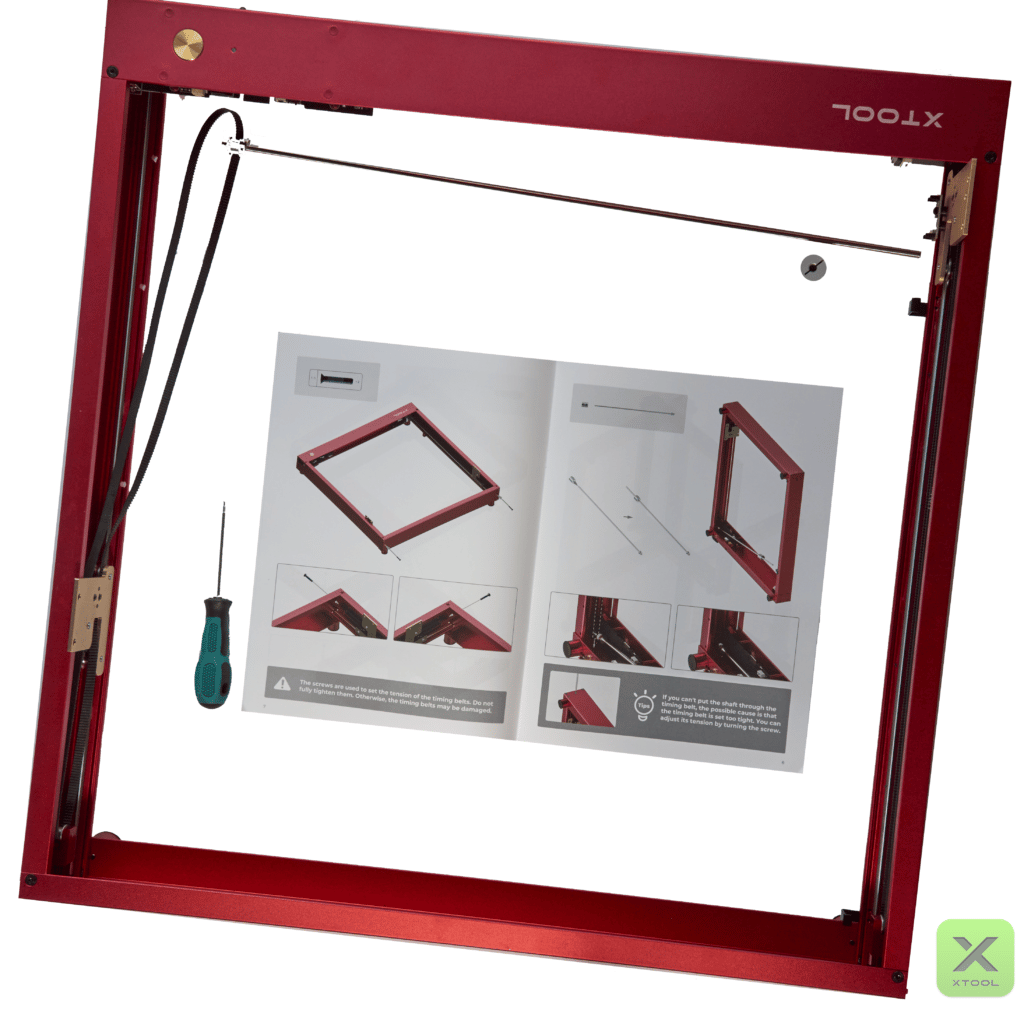
Picking up the quick start guide one can appreciate the time and effort in producing a very clear and descriptive guide. Each page contains visual representations of the parts required in sequential order. All the images are in full colour and high quality, well laid out and easy to follow.
The assembly of the chassis is straightforward, screws are identified with a colour marker, ensuring the correct screws are used.

Once the frame is complete, the two screws marked in blue are inserted into the rear of the frame connecting to the adjustment blocks for the y-axis belts.
The stepper motor shaft is next, after attaching the stepper motor coupling, insert the shaft into the front of the machine. Please ensure the shaft is inserted with the gear head to the right and install the belt over the gear. Loosen the motor coupling by unscrewing the hex screws (do not remove them completely). Slide the coupling onto the shaft and align the shaft with the stepper motor on the left. Slide the coupling and attached the left side of the coupling to the shaft on the stepper motor and secure, finally secure the coupling to the shaft to the right and secure. (please ensure the coupling is secured on the flat end of the shafts, otherwise, it may slip in operation).
Select the motor cable and connect the stepper motor and motherboard (please ensure the cable is inserted in the correct orientation) and secure the cable to the machine frame, removing any excess from the cable ties.

It’s now time to install the gold gantry on the x-axis, please note that three cable ties securing the gantry need to be removed (please ensure not to cut any of the cables)

To install the gantry, slide the two gold brackets to the rear of the machine and attach them with the stepper motor on the left-hand side (opposite the on button). Secure the gantry in place and install the x-axis screw used to adjust the belt tension.

The cable attached to the gantry now requires routing along the left side of the laser frame with cable ties. Connect the main cable to the motherboard, these are colour coded. Insert the other end of the cable (black right-angled) into the x-axis motor.
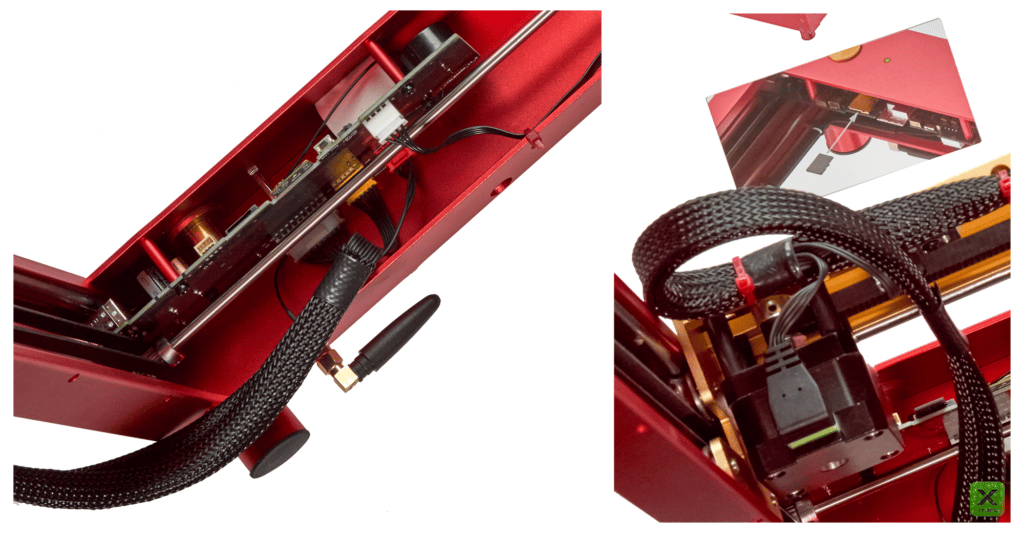
Time to install the laser head, connect the white Molex cable to the rear of the laser and slide the braided cable into the small area above the Molex connector. Slide the laser head into place and rotate the left adjustment lever to secure it. Install the airline connection and tighten it with the supplied wrench (don’t overtighten at risk of damaging the threads).
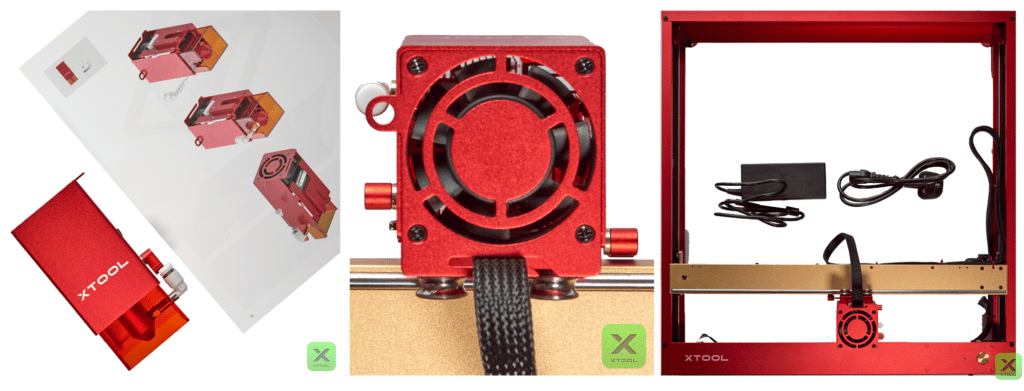
Notes on the Assembly
- Ensure the x-axis and y-axis movement is not impeded by the cable ties, adjust as necessary.
- Remember to remove the plastic cover on the laser nozzle before inserting the air connector.
- Ensure the belts on the y-axis are tightened equally, to adjust loosen the screw on the side first before adjusting. Following adjustment tighten the screws on the side to ensure the belts remain tight. Please check that the y-axis belts are inserted into the belt slots. See pic:
- Do not move the gantry or laser head quickly by hand this can damage the machine.
Included Accessories

xTool Creative Space Software
xTool supplies its software called xTool Creative Space (XCS), which is downloaded directly from the xTool website https://www.xtool.com/pages/software

Firmware – Update
The xTool D1 Pro required a firmware update and this was a simple procedure. There is a small switch on the motherboard to turn on for the update to be successful. The new firmware is downloaded via the XCS software automatically, and the update takes a couple of minutes (if the progress stops a 3% the switch is not in the on position). The machine will restart and will be ready for operation.
xTool D1 Pro 20W First Test
xTool supplied a material box with a wide selection of materials from wood to stainless steel (full list found below).
I selected a piece of basswood (Pine Plywood) 3mm for an initial power test. These are designed to run at varying levels of power indicating a suitable power setting for the type of material being tested.
This first test was performed without air assistance and you can see there is burning around the test panels and the laser failed to complete the cutout.
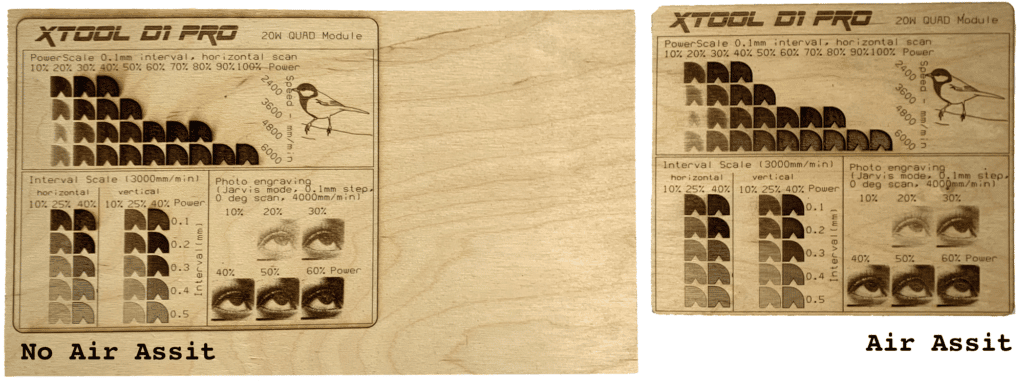
The second test was run identically except for the inclusion of air assist and the results speak for themselves, the burning outside the test panels is reduced to minimal and only in areas of high power.
The xTool Air Compressor
The air compressor is no thing of beauty but it works as intended by reducing burning and providing a noticeably cleaner cut. The unit connects to the laser head via the supplied tube and connections for the pump. The 20w laser head has a built-in tube guide unlike the previous versions 10w and 5w. However, the pump includes an adaptor to guide the tube, installed by removing two screws, lining up the adaptor and reinserting the supplied and longer screws. There is also a replacement nozzle included for the previous versions of the laser head. The new nozzle allows the air pump connector to be installed. The air pump is relatively quiet and sits on rubber-dampening legs, just ensure it sits on a solid surface for maximum reduced noise.

xTool Material Box
xTool supplied a material box (sold separately), it contains the following materials:
- Stainless Steel Necklace x 2
- Stainless Steel Tags x 10
- Metal Business Cards
- Silicone Rings x 10
- Laser Engraving Rubber Mat
- Pine Cubes
- Fir Coaster x 2
- Bamboo Spoons x 2
- Cherry Plywood x 1
- Pine Plywood x 1
xTool D1 Pro Pre-flight Checks
Laser Focus
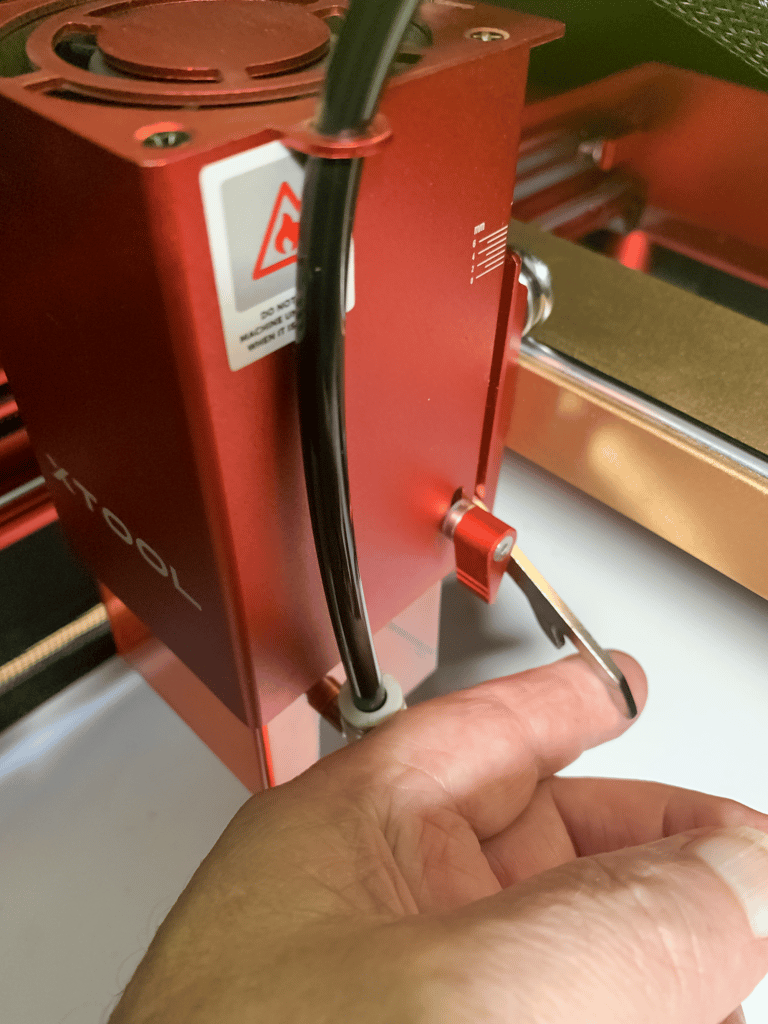
To ensure the correct focus of the laser, move the laser head over the work material and release the focus arm. Adjust the height of the laser head until the focus arm rests on the material, tighten the laser head lever on the left and return the focus arm upwards.
Laser Connection
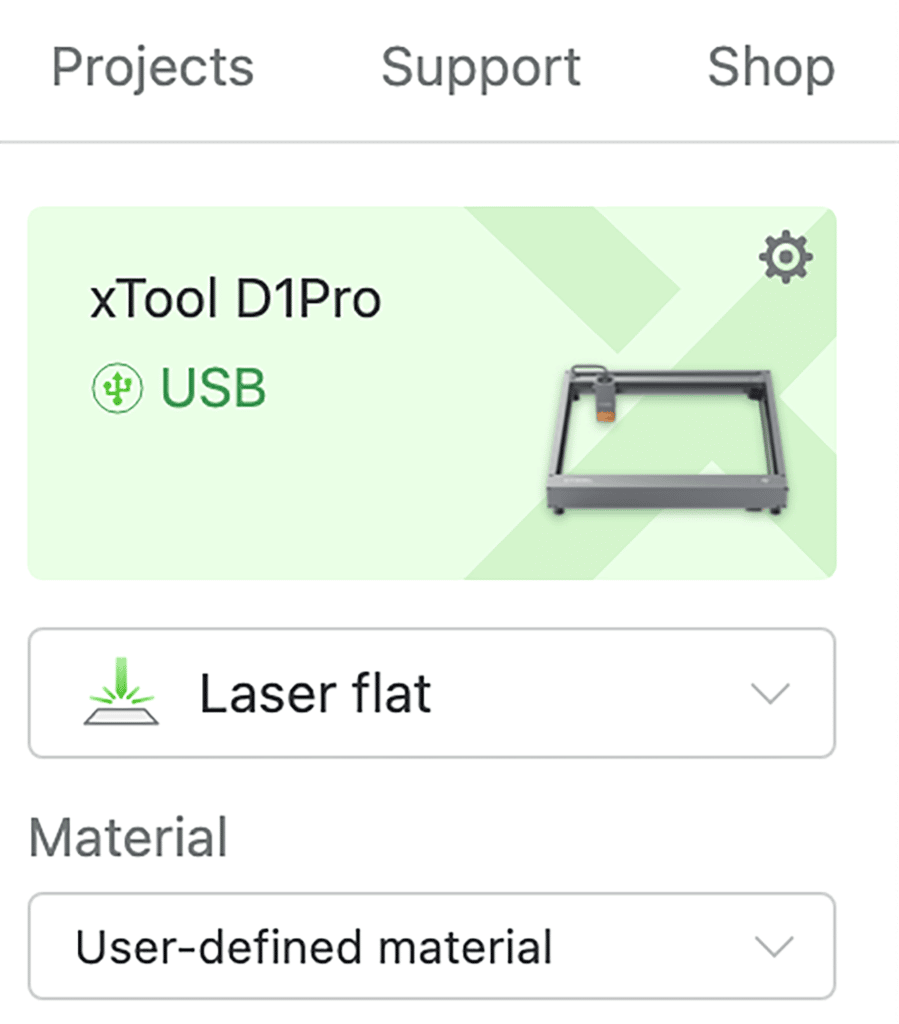
Ensure the laser is on and connected to the XCS software; check the upper right of the screen USB or WIFI.
Air Assist
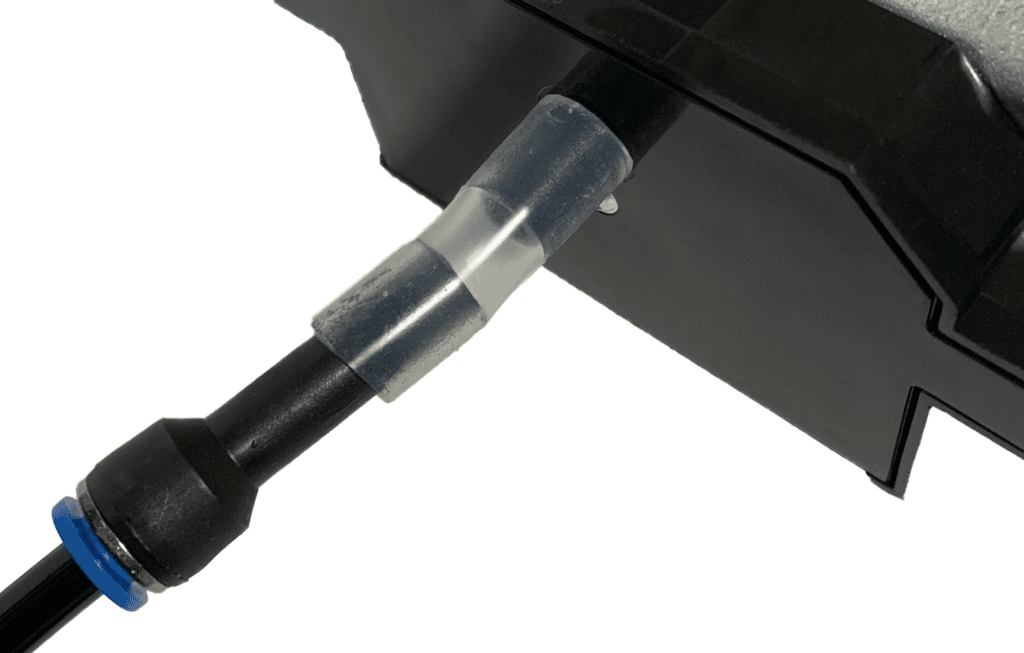
Check to ensure (if available) the air hose is connected and the pump is on.
Laser Head Adjustment
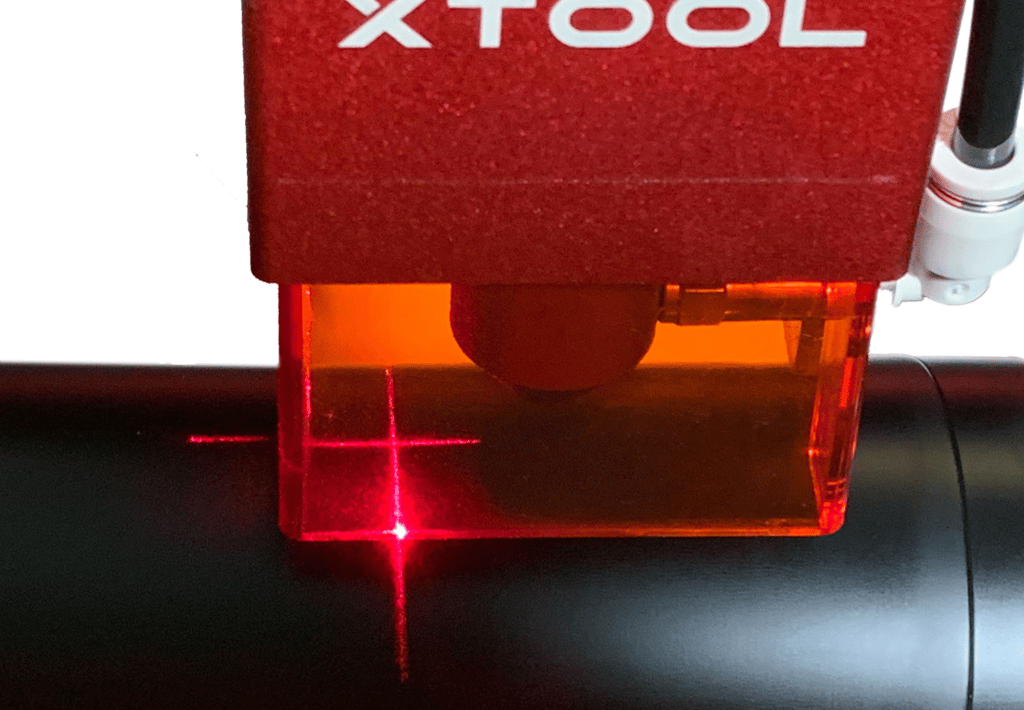
Manually move the laser head into the selected framing point and frame by pressing the button on the front right of the machine. Please ensure the framing matches the intended working area. If the laser head moves before starting the laser, you must reset and frame it. Otherwise, you will end up with ruined materials; experience talking.
Laser Engraving and Cutting with the xTool D1 Pro 20W
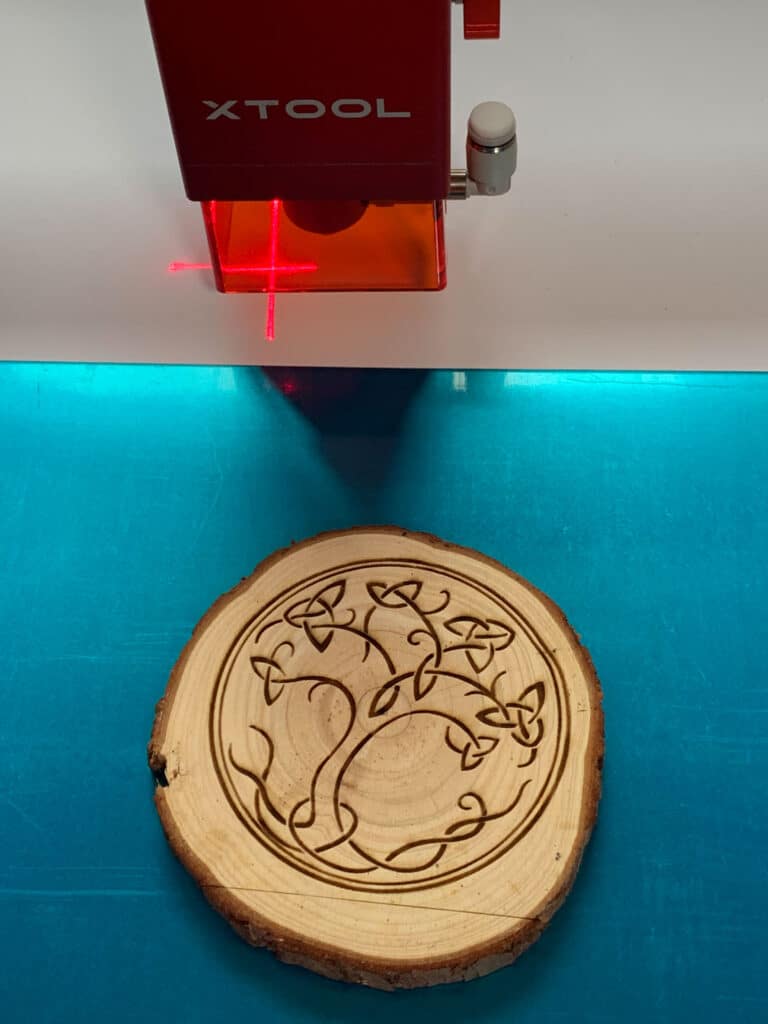
Round Fir Coaster Test
The fir coaster supplied in the media box has a live edge and is 10 cm in diameter. I found framing from the centre point of the coaster worked well. The coasters are natural and not perfectly round. To compensate for the irregular shape, I reduced the framing size to avoid engraving outside the material.
Power settings used: Speed 266mm/s Power: 50% Air Assist: No
Metal Business Card Test
I selected a black metal business card 85 x 55 mm. To frame the business card, I utilised the upper left framing point.
Tip: Move the laser head crosshairs on both the y-axis and x-axis and eyeball to ensure the business card is square to the laser.
https://youtu.be/AW9OtrRC8lk
Power settings used: Speed 266mm/s Power: 50% Air Assist: No
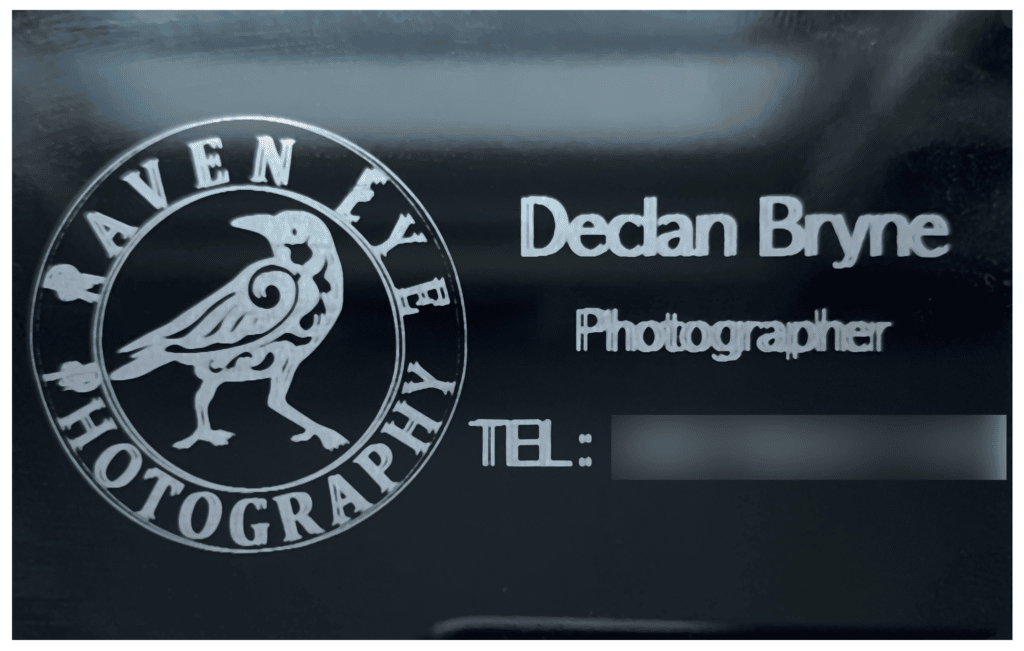
The card engraving result was poor, printing double lines. After troubleshooting, I found the Y-Axis belts were not tightened equally, hence the double lines. This was fixed and the issue did not reoccur.
Stainless Steel Tag Test
I selected a round stainless still tag, approximately 30mm in diameter. I choose the centre point to ensure the image was central.
https://youtube.com/shorts/FljIRq5apDE?feature=share
Power settings used: Speed 33mm/s Power: 100% Air Assist: No
The power was set at maximum, but I slowed the speed down significantly to produce an excellent portrait.

Wooden Stamp Block
This small wooden block measures 30 x 30 x 10mm it appears to have a light coating of sealant or varnish. I choose an image of a rearing deer that has small details.
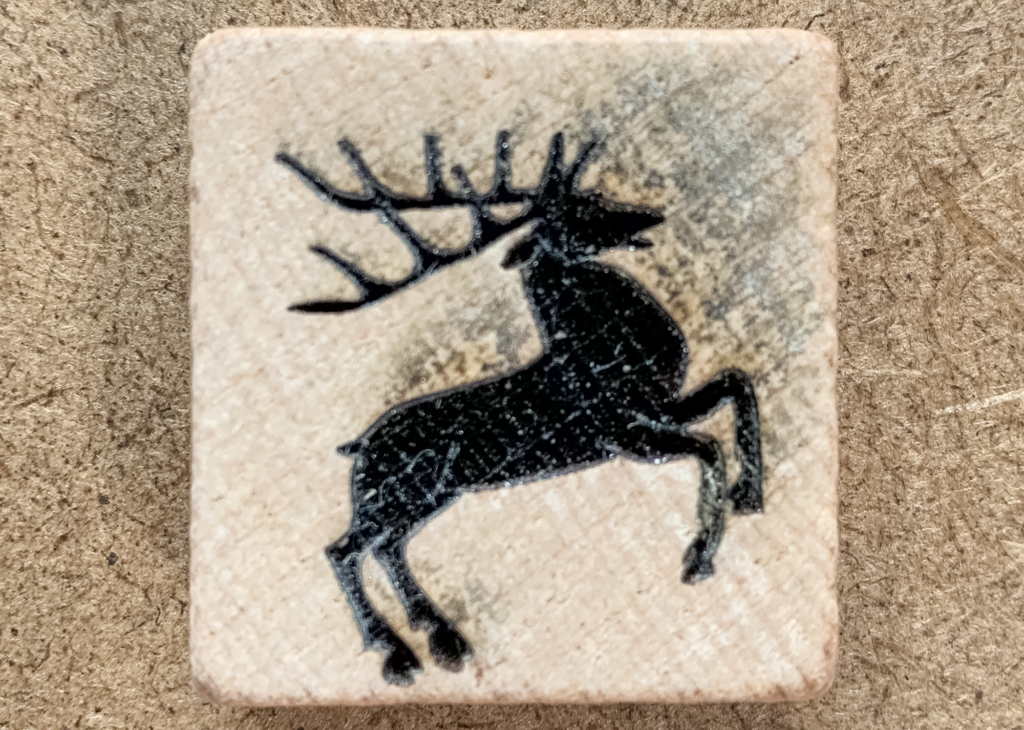
Power settings used: Speed 80mm/s Power: 60% Air Assist: No
The result was a well-defined negative image that would stamp the print cleanly. The ink pad supplied in the material kit had very little red ink and was insufficient for a clean stamped image.
Cherry Wood
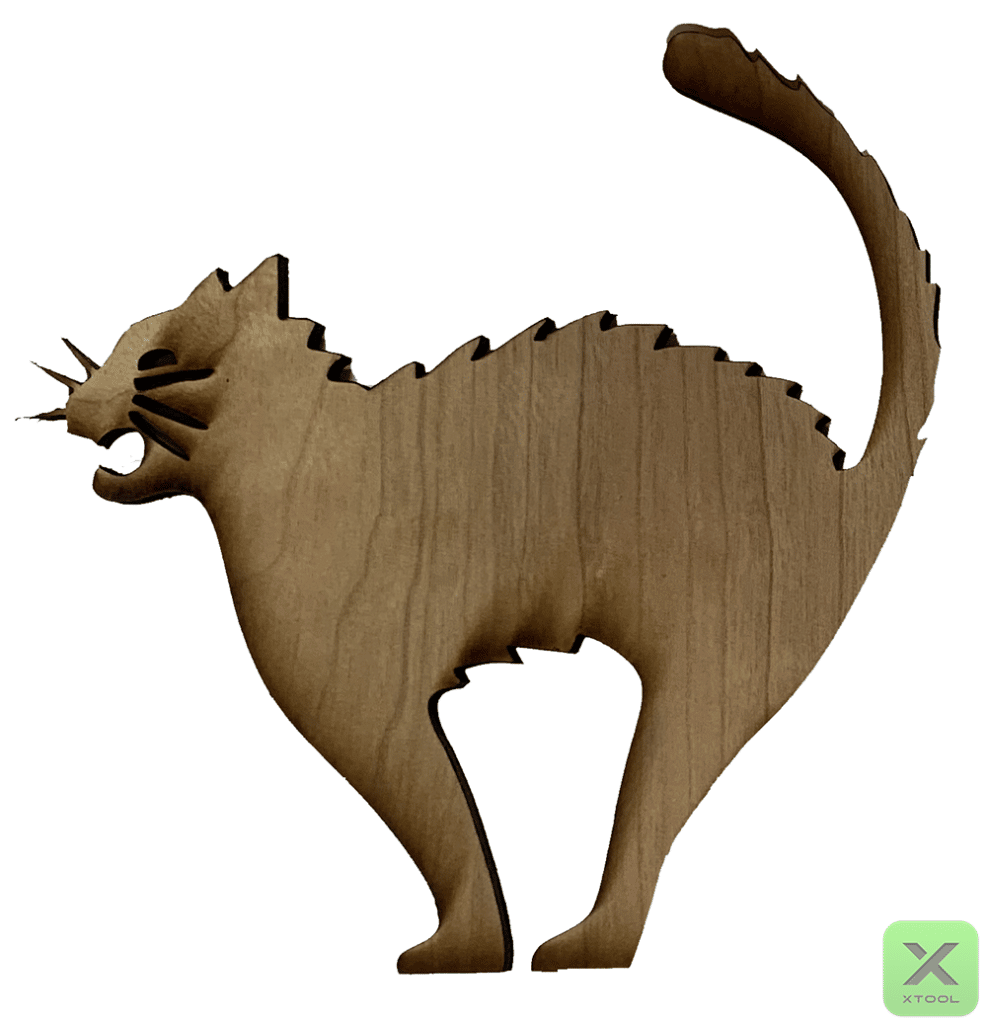
I decided that the 3mm plywood would be ideal for laser cutting; I selected an image of a cat (downloaded from https://laser-templates.com) I imported the image into XCS and selected CUT from the three options Score, Engrave and Cut.
https://youtu.be/FafeIJy2S-0
Power settings used: Speed 7mm/s Power: 100% Air Assist: No
I was pleased with the first cut. However, there is increased burning around the whiskers. The cut was made without air assist and sat on a sacrificial board; a mesh board and air assist would have improved the final result.
Pine Plywood
* Please see First Test – Xtool D1 Pro 20W above
Slate Coaster – Unsealed
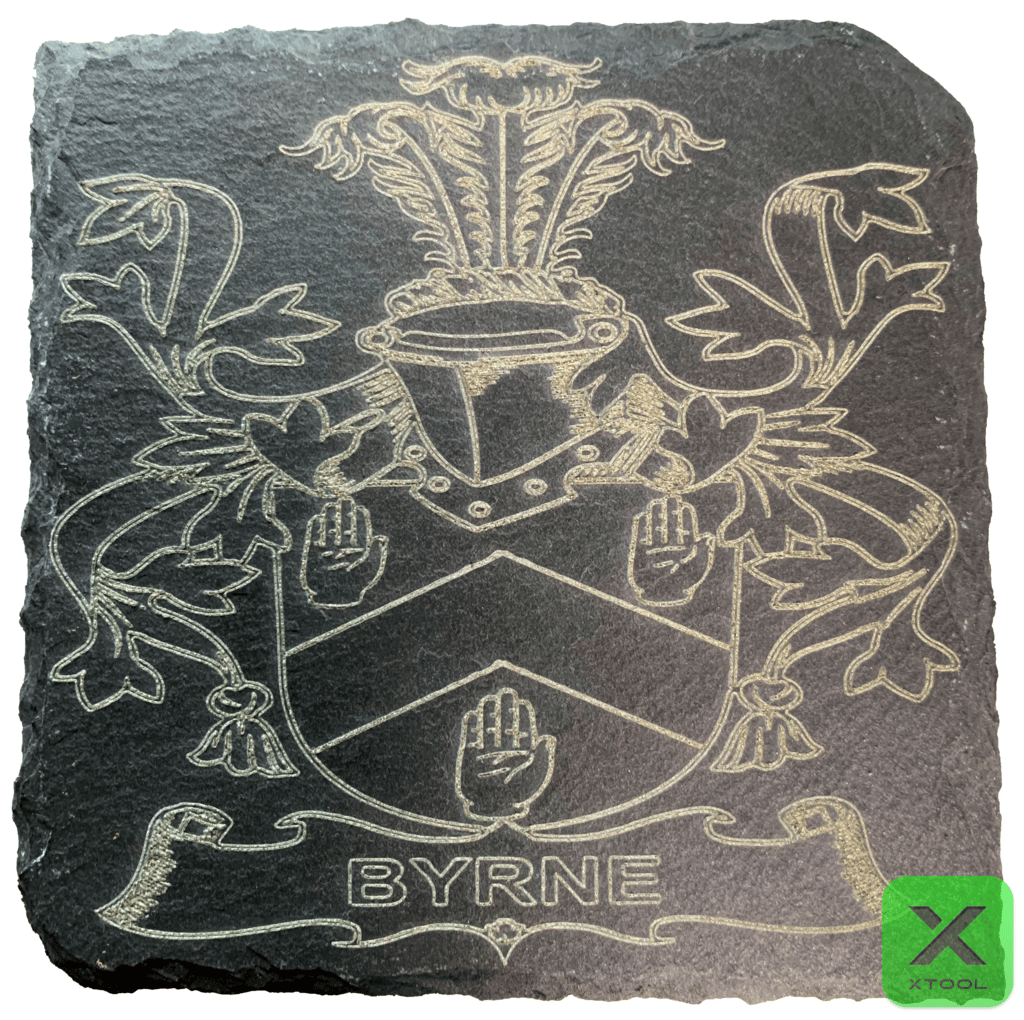
The slate coaster is 100 x 100mm and stands on four rubber feet. The slate is a natural stone, the slate will require sealing before use. The framing was set to the top left and the scoring size was set at 90 x 90mm due to the live edges of the stone.
Power settings used: Speed 80mm/s Power: 100% Air Assist: Yes
The slate was engraved with the Bryne coat of arms and the results were impressive.
Cork Mat
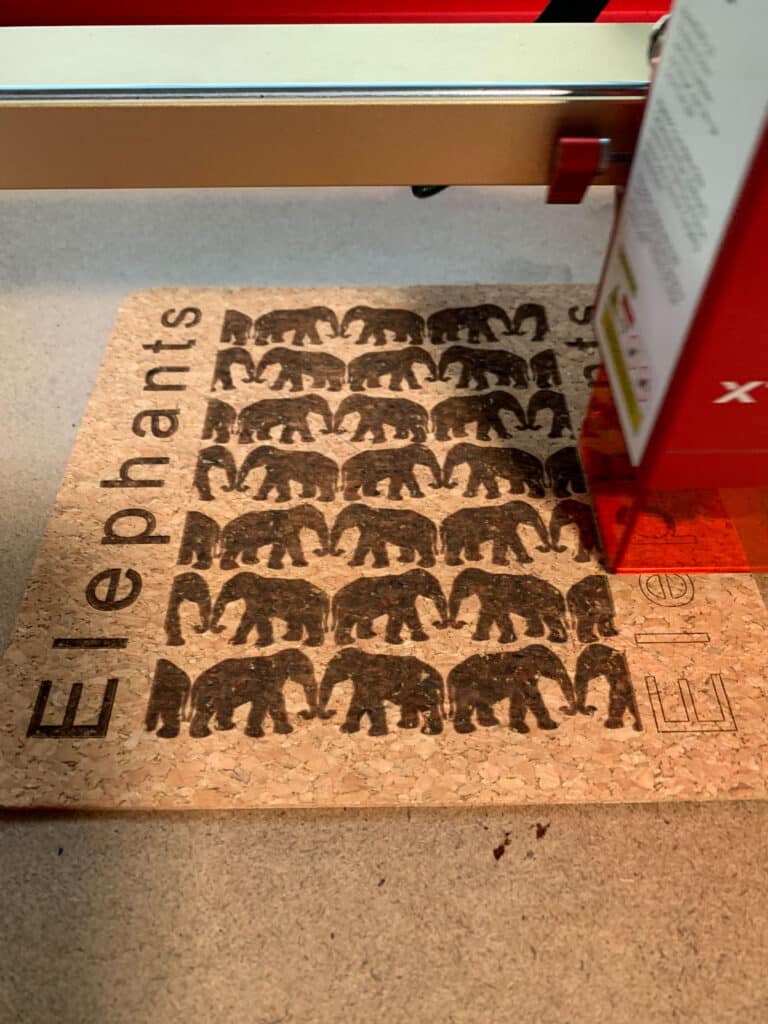
The Cork mat is included in the free material pack. I designed an elephant pattern in Adobe Photoshop and imported this into XCS.
Power settings used: Speed 200mm/s Power: 60% Air Assist: No
The result was excellent; the stencil elephants were well-defined with crisp text.
Basswood 3mm
I purchased some 3mm Birch Ply for delicate cutting. Just how fine can the xTool D1 Pro cut?

Power settings used: Speed 30mm/s Power: 80% Air Assist: Yes

The result was simply stunning, all the delicate cuts were precise and the cutting was perfect. The level of detail did not challenge the xTool D1 Pro finishing the job in around 9 minutes. The intricacies of the design are replicated exactly. (https://laser-templates.com)
Glass Discs
Included in the material box are two circular glass discs, I utilised two black business cards and focused the laser on the black cards, not on the glass.
https://youtu.be/g4uxbt7_AZY
Power settings used: Speed 30mm/s Power: 100% Air Assist: Yes

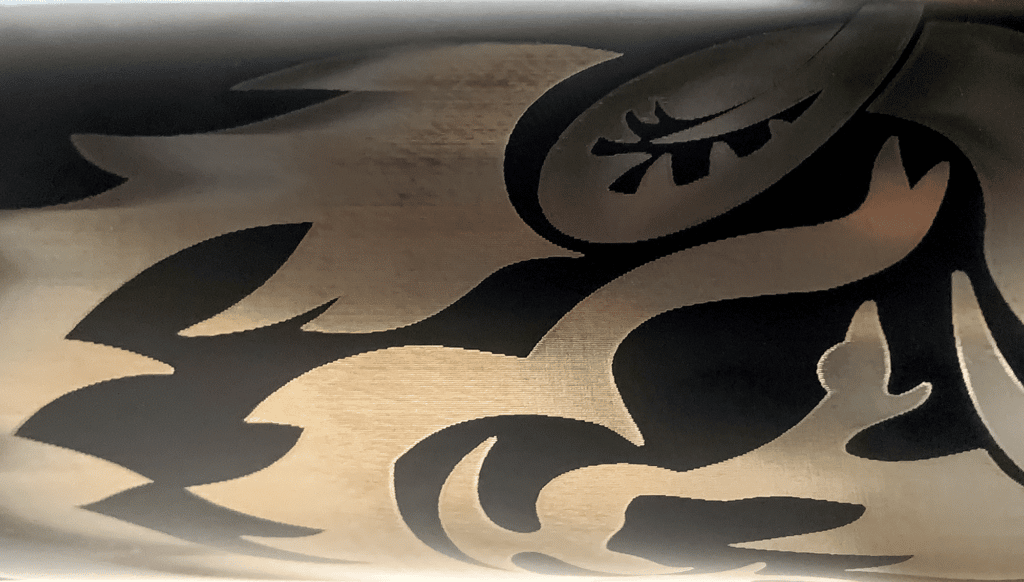
This image is a magnified image of a glass engraving. The glass was placed on black cardboard and focused on the black cardboard. The final engraving was impressive.
xTool D1 Pro 20W Enclosure
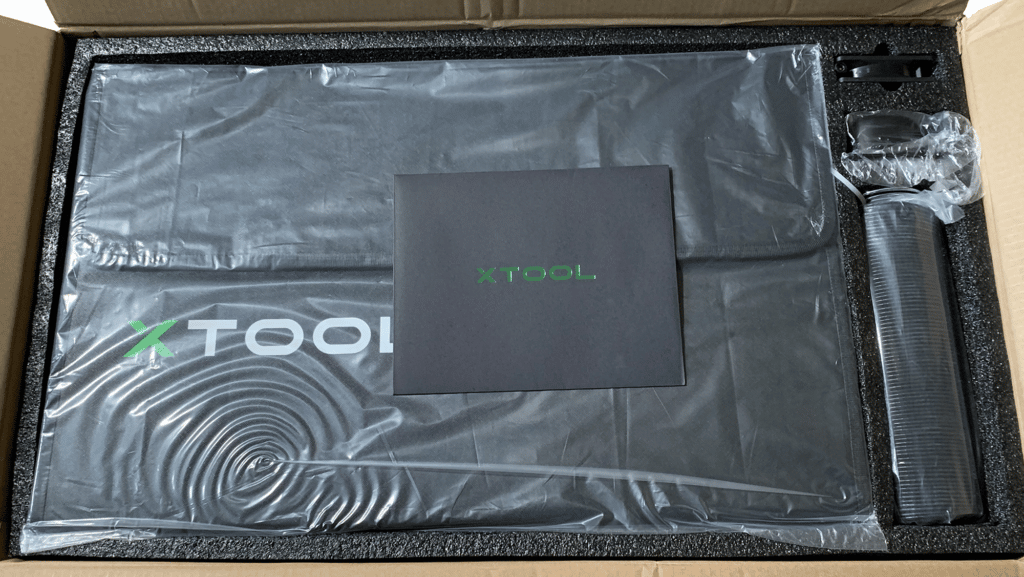
The xTool enclosure is made from flame-retardant materials and includes a viewing window with built-in protection from the laser light. The enclosure is packed neatly in a large flat box measuring 74 x 12 x 44cm. On opening, you are greeted with a black envelope sporting the xTool logo in shimmering green, a nice touch.
The box contains the following:
- Top Side – Including Viewing Window
- Left Side – Including Air Intake Mesh
- Right Side – Including Holes for Fan / Air Tube
- Rear Side
- Front Side – Includes Cut Out
- Exhaust Tubing
- Flange Exhaust Connector
- Fan + Power Adaptor
- Spring Clamps x 2
- Hex Key 2.5mm
- M4*35 Screws x 4
- Nuts M4 x 4

The xTool enclosure was easy to assemble without the included instructions. The enclosure is held together with extremely strong Velcro and fits the xTool D1 Pro snuggly. There are openings for the USB, power and air assist. A Velcro patch on the front right side adjusts in height when the machine is utilising the included feet. The image below demonstrates the excellent packaging by xTool.
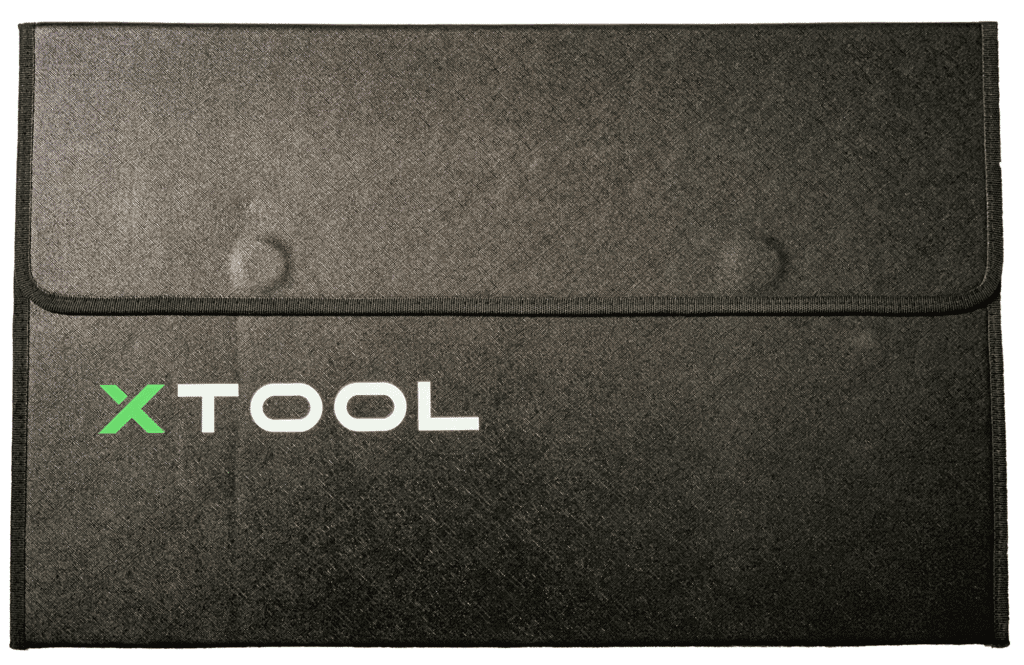
The front flap and top are secured with internal magnets and Velcro.
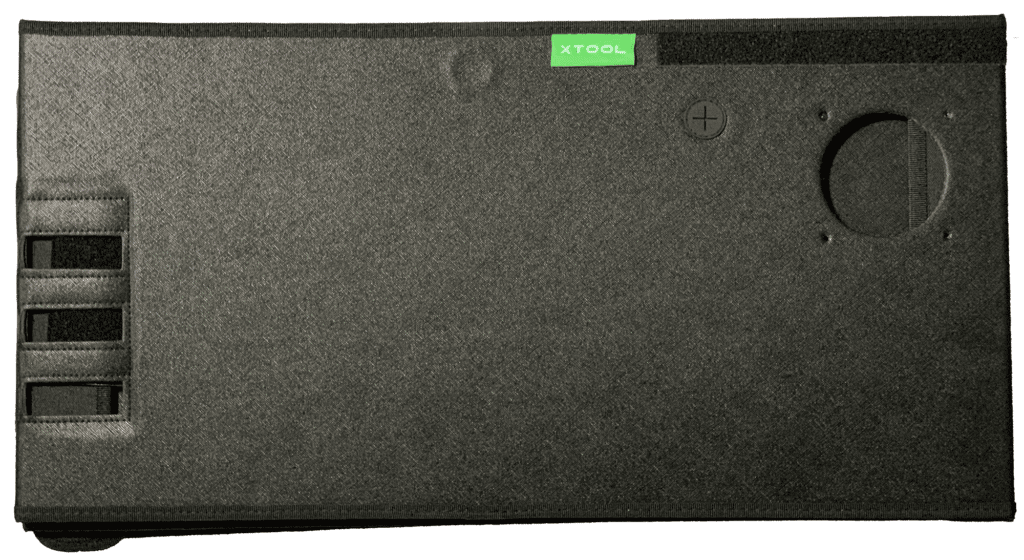
The right side of the enclosure contains the opening for the included fan, an adjustable velcro pad for the power and USB inputs. Also, this side accommodates the airline opening with a rubber grommet. The left side accommodates the air intake mesh; please ensure this is left clear for effective fume removal.
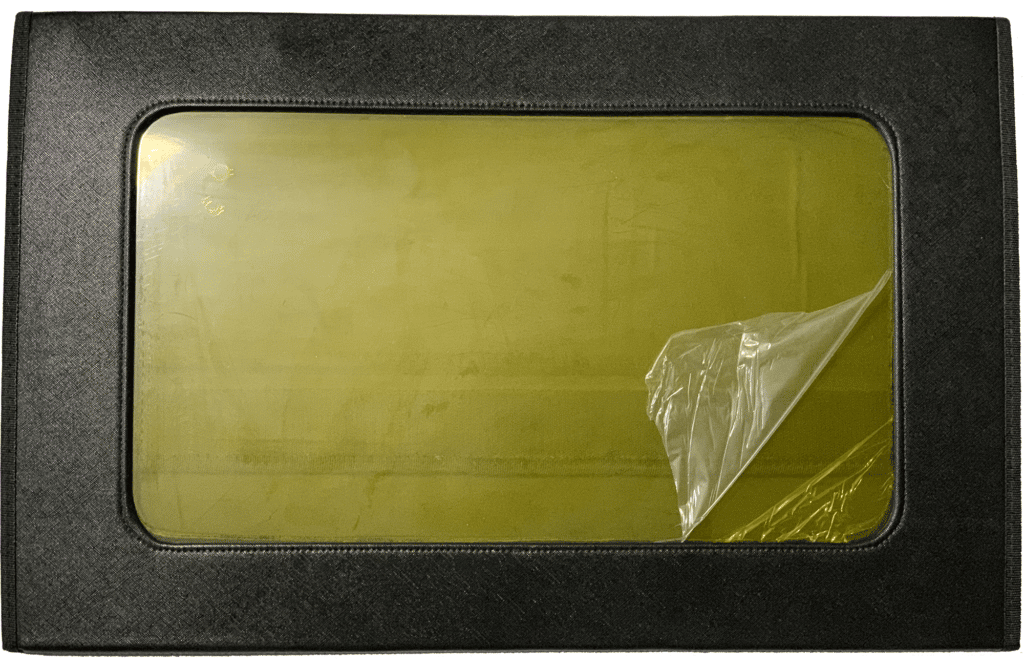
The top of the enclosure contains the viewing window to protect the operator and the perspex window blocks the harmful laser light. Please remember to remove the plastic coverings from both sides of the viewing window before use.
The included fan is supplied with four(4) screws and four (4) nuts. The fan attaches to the right-side panel; please ensure the fan is oriented to exclude the fumes. An arrow on the fan body ensures the fan is installed correctly.

When the top flap is in the open position it’s secured by two restraining straps held in place by press studs. In my example, the press stud on the left-hand side was not in line with the press stud on the right-hand side. The flap is skewed, but it held in place and was not a big issue.
The enclosure reduced the noise from 85db to 65db, worth the cost just for this benefit alone.
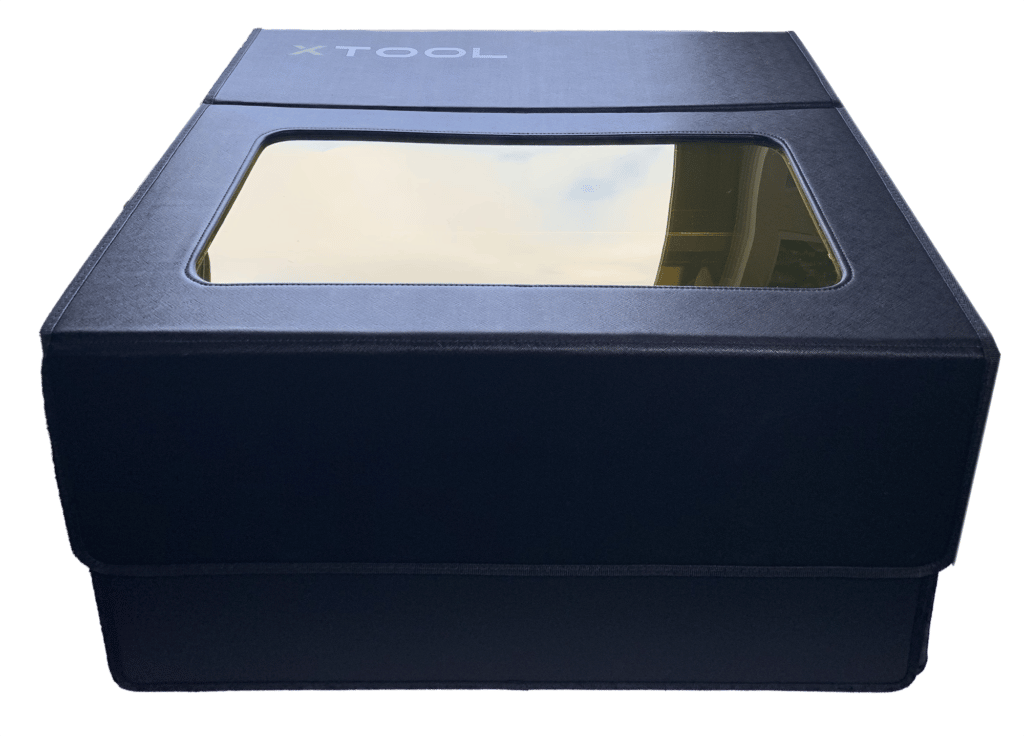
The enclosure also features a handy tool holder made from a Velcro strap. There is an air intake mesh on the lower left side and needs to be kept clear when using air assist.
xTool RA2 Rotary Attachment 2 Pro
The RA2 is a rotary attachment to the xTool D1 Pro, the first 4-in-1 rotary attachment available for a Diode Laser. In its basic form, the RA2 is a standard rotary attachment; with two rollers on an aluminium base. The rollers are adjustable to accommodate different-sized cylindrical materials (glasses, tumblers etc). A single wire connects the rotary attachment and then to the motherboard.
The box contains the following:
- Rotary Attachment 2
- Support Module
- Tail Module
- Chuck
- Double Step Jaws x 3
- Single Step Jaws x 3
- User Manual
- Mini Level
- Hex Screwdrivers x 2
- Connection Cable
- Chuck Key
- Belt
- Adapter
- Screws x 12
- Stud Components
- Tape Measure
xTool RA2 Assembly
The RA2 comes well packaged and protected from damage by foam inserts stopping the parts from moving during shipping.
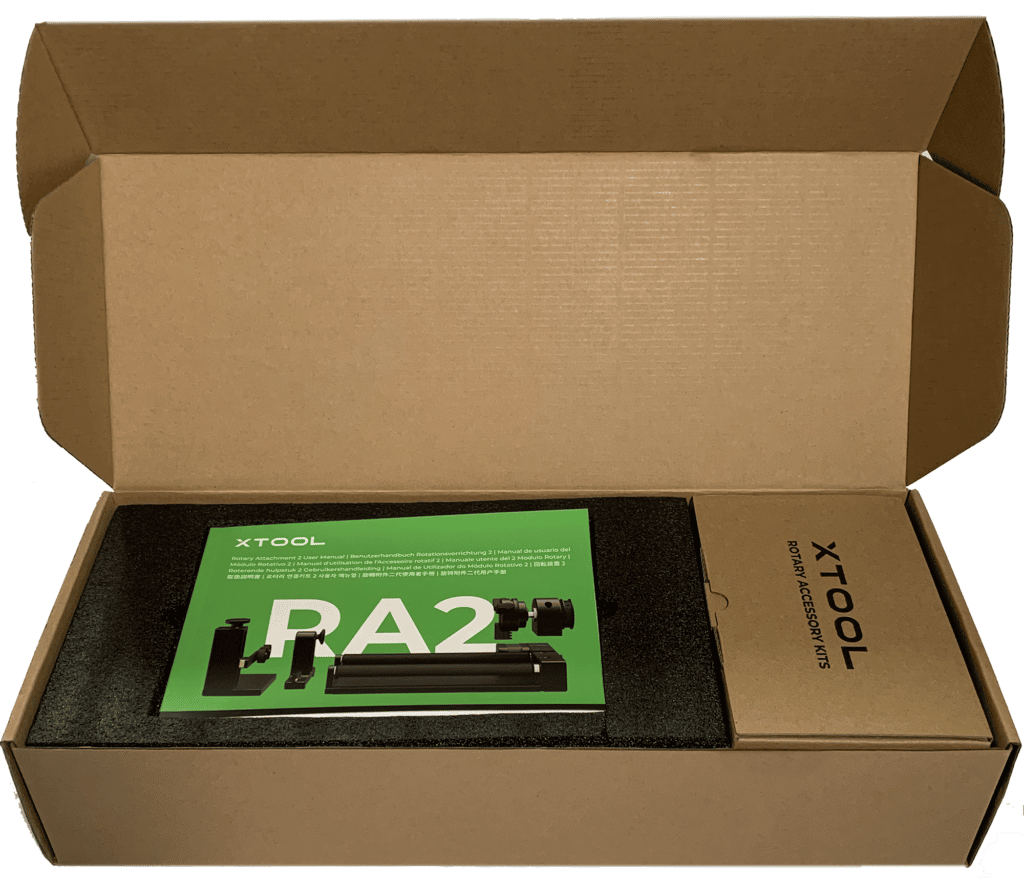
Removing the parts from the box reinforces the feeling of quality; each piece is well-engineered and built out of quality materials.
The RA2 is fitted with the rollers out of the box. The rollers are readjusted by removing a small screw on the base and removing the roller. The alternative roller locations are marked with A, B, and C.
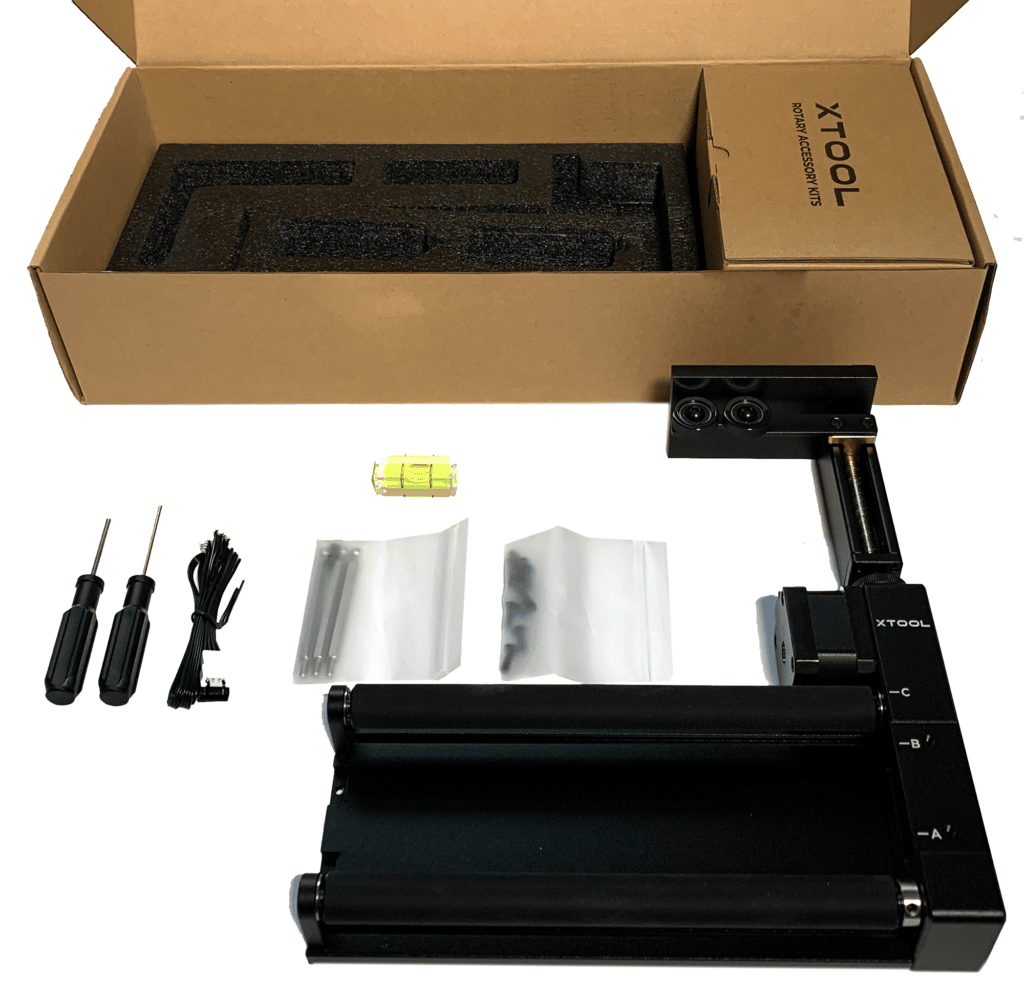
The RA2 is attached to the motherboard with the included cable. First, the existing y-axis cable requires removal from the motherboard by pulling downwards on the connecter.

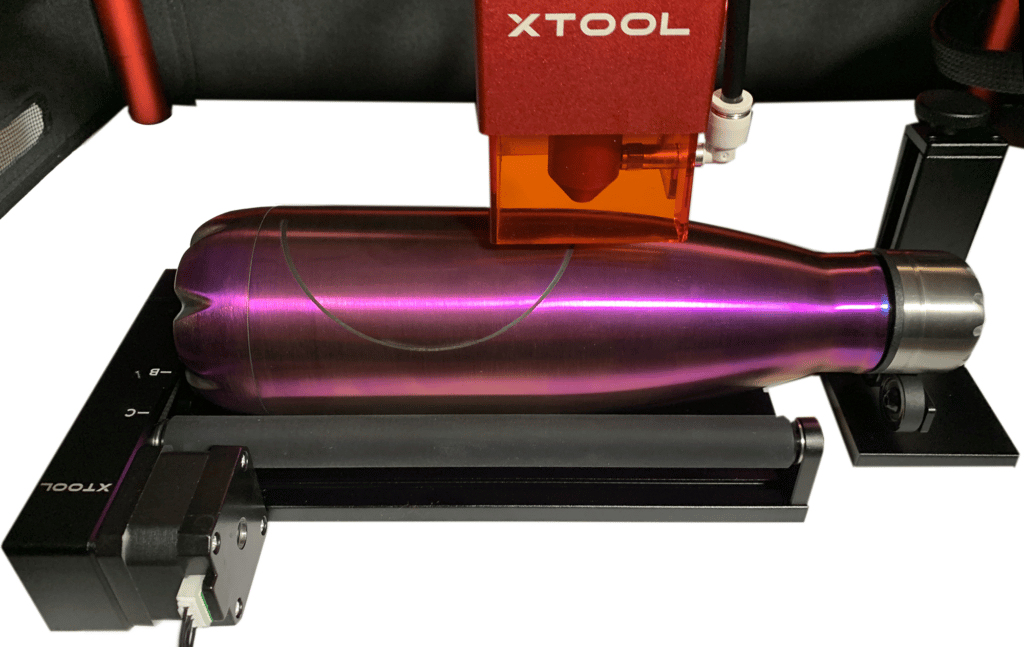
There is an adjustable stand with support rollers for materials that exceed the bed of the rollers. I found the stand works well will long materials and those that have a narrow neck, this ensures the laser material remains steady during the laser engraving process. Once the RA2 is connected, the bed needs to be aligned parrel to the frame and gantry.

Below is an example of the bottle with a narrower neck being supported on the rollers and the support Module.
Anodised Extension Legs
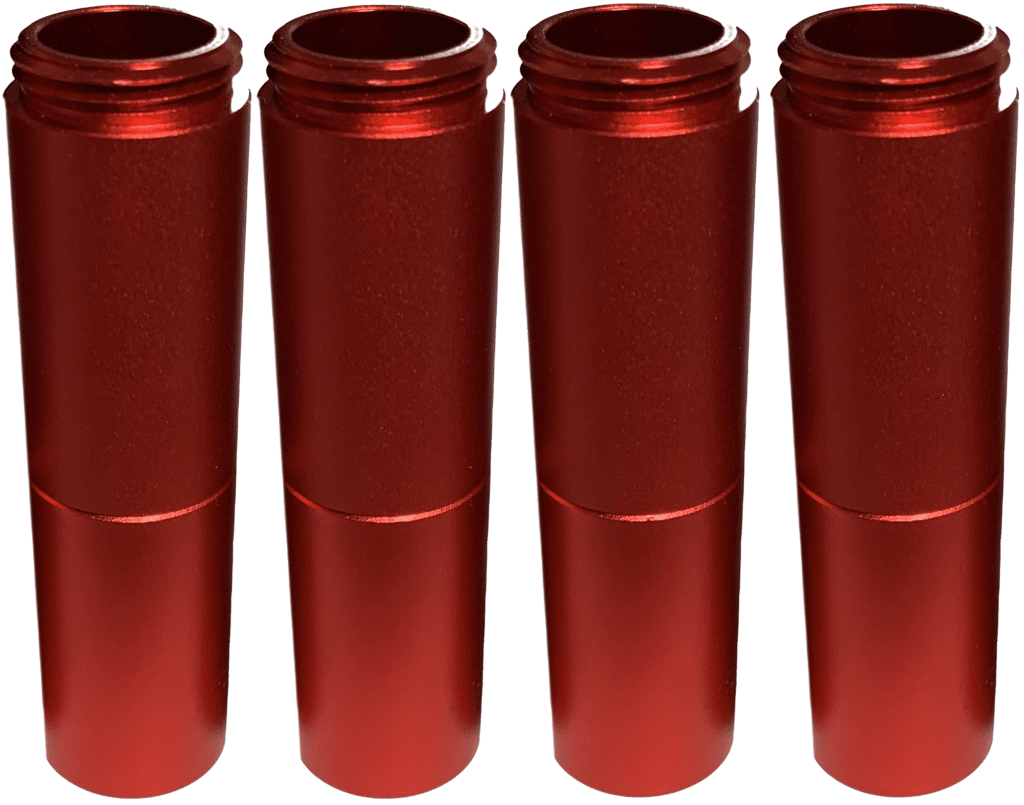
The supplied leg extensions raise the xTool D1 Pro to facilitate taller workpieces and the RA2 rotary accessory. The legs are beautifully engineered and match the stunning red of the xTool D1 Pro. The legs screw together and are attached to the xTool D1 Pro by removing the rubber from the existing feet and screwing in the leg extensions and finally replacing the rubber bungs.
The RA2 comes supplied with a hefty chuck, small in size but passes the quality weight feel. Installing the chuck requires a modification of the RA2, all required tools and instructions are included in the box.

Rotary Test – Rollers + Support
The test material was a 350ml metallic black flask made from stainless steel and painted black. I placed the bottle on the roller bed (no adjustment required) but found the cap end of the bottle was top-heavy. The cap end of the bottle was supported with the included support module. The support module was easy to adjust and the mini sprit level came in useful.
In the xTool Creative Space software, the rotary was selected and my logo was chosen as the image.
Unfortunately, the engraving didn’t go as planned! This was entirely down to user error and not the RA2. I forgot to mirror the image and the logo was in the incorrect orientation.
Power settings used: Speed 60mm/s Power: 100% Air Assist: YES
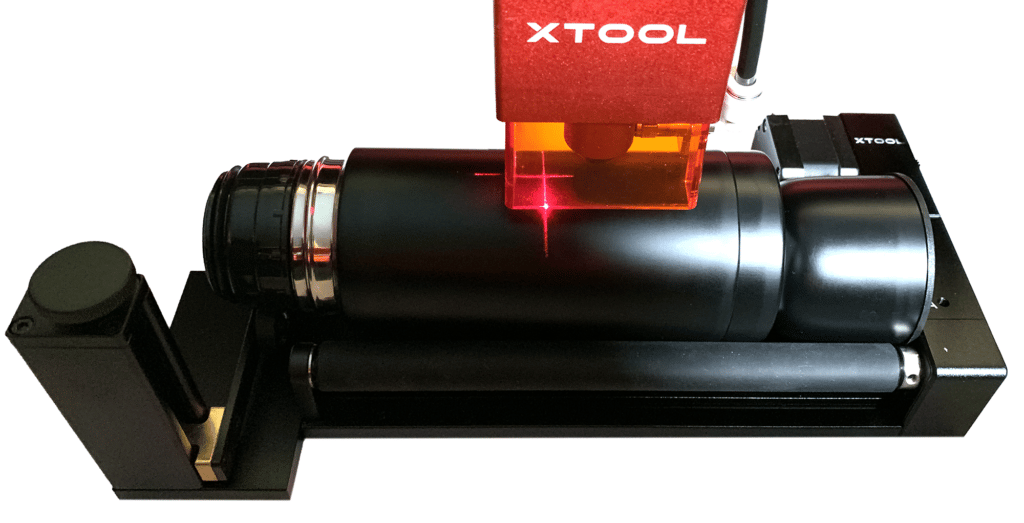
The results were tremendous the resulting engraving was accurate and extremely sharp.
Installation of the RA2 Rotary Chuck
The rollers on the RA2 require removing before installing the chuck and gear for the stepper motor. To remove the rollers, first, remove the two on the base
The gear extension is fitted to the drive shaft of the stepper motor (this was difficult as the hole in the gear was so tight, I greased the shaft and gear and eventually managed to install the gear to the shaft). Tighten the Hex screws via the hole located above the stepper motor shaft.
To install the chuck, wrap the provided belt around the small gear installed earlier and the corresponding gear on the chuck. Ensure the chuck faces toward the base and is secure with the two M4*20 screws in positions A and B.

*Ensure you store the rollers, caps and screws safely for future use.
Locate the chuck key and open the chuck to ease the installation of the required jaws, these attach to the chuck with two M4*10 screws.
If required slide the tail module to the base and secure using the small lever.

Rotary Test – Chuck and Tail Module
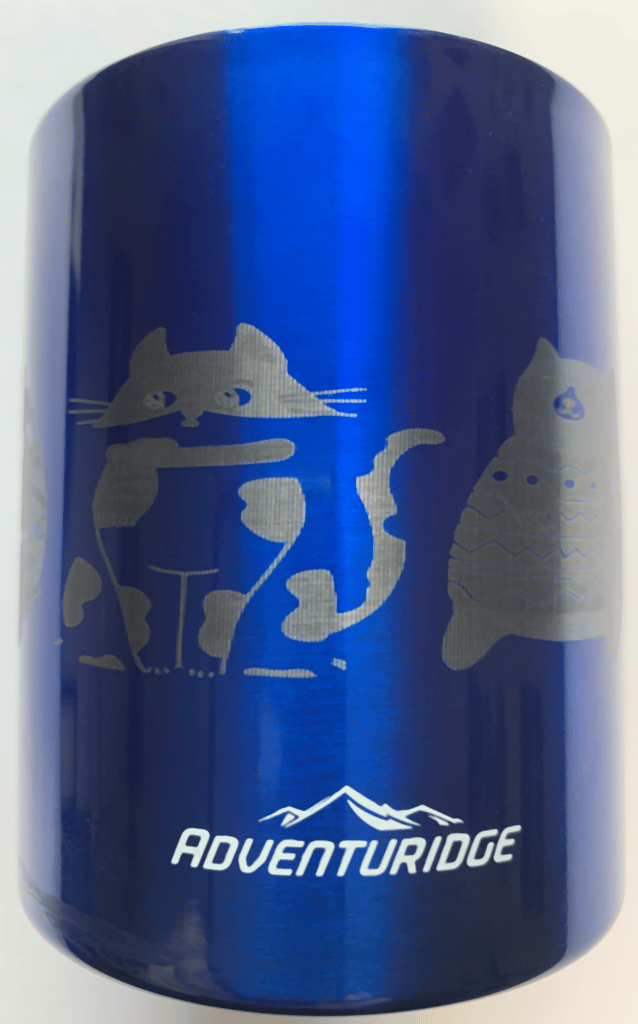
I selected an anodised cup for the chuck test. The cup had a removable handle, this was removed before setting in the jaws of the chuck. I clamped the cup by the outside rim but this limited the travel of the laser head. Extending the jaws inside the cup provided unimpeded laser travel. The tail module was positioned at the base of the mug for extra stability.
Power settings used: Speed 60mm/s Power: 100% Air Assist: YES

The RA2 rotary accessory is versatile and the chuck direction can be modified to face in the opposite direction, thus enabling items with handles.
Finally, the RA2 kit comes supplied with four (4) stainless arms that attach to the chuck and provides support for engraving rings.

The chuck can also be reversed to accommodate items with handles, the base would need to be supported as this could lift due to the material’s weight. The xTool RA2 is a very adaptable accessory that opens up and extends the capability of the xTool D1 Pro 20W,
Observations and Recommendations
Installing the xTool D1 Pro with xTool Creative Space was a breeze and went without any issues. Unfortunately, the same can’t be said for Lightburn it was a pain. The xTool D1 Pro is not found within the software on a Mac OS, the laser has to be imported via a file download from xTool. After much searching and watching many YouTube videos I found the file needed for the import on a Lightburn forum. (link: https://support.xtool.com/hc/article_attachments/7316422596247/xTool-D1-V2.lbdev)
I installed the file and imported the xTool D1 Pro without any further issues, this information needs highlighting in the xTool quick start guide.
Cable routing could be improved by the provision of self-adessive clips so the main cable can be clipped to the bottom of the frame. This is to prevent the gantry from catching on the zip-tied cable whilst in motion.
I was unable to change the red cross projected by the laser, despite changing the setting in XCS, this may be a firmware issue.
The control/motherboard is open to all the contaminants from the materials used on the laser. It was covered in fine rubber dust after I tested the rubber from the material box. This issue could be resolved by enclosing the motherboard in future editions of the xTool D1Pro.
The xTool D1 can cut 10 mm of wood, however, I wouldn’t recommend it. The cut is blackened with soot residue and the time to cut this thickness is prohibitive.
Flat media like basswood needs to be secured down to ensure it remains flat. The basswood warps when being cut and this can lead to poor results and can impede the laser movement.
The xTool D1 Pro’s Wi-Fi is not compatible with Lightburn software, this may change in future firmware updates.
Some holes in the enclosure were not drilled out for attaching the fan. When the legs are fitted to use the RA2 rotary accessory the airline contacts the top of the enclosure and may cause issues with the laser head.
The xTool D1 Pro’s motherboard has one connection for the y-axis, as such, I could foresee an issue from wear and tear from constantly plugging and unplugging to connection to facilitate the RA2 rotary accessory. The inclusion of a separate y-axis plug for the RA2 would negate this issue and prevent damage to the motherboard.
The fan on the enclosure and the airline pump have to be switched on separately, maybe Xtool could implement a solution to control these once the laser starts!
Positives
- The xTool D1 Pro is well-engineered and easy to build, a very solid platform.
- The colour Golden Red is stunning
- The XCS software is well-presented and easy to follow (unlike Lightburn).
- The enclosure is a must for the xTool D1 Pro, without it, the process is noisy and the smoke generated is hard to dissipate.
- The Air assist is also a must-have, it allows for cleaner cuts and increases the cutting depth of the laser on each pass.
- The laser comes well packaged and the presentation reminds me of a certain company with a fruit logo!
- The included instructions are clear and precise, the quick start guide is colourful, detailed and well laid out.
- The 20W laser is impressive, laser engraving and scoring are sharp and full of detail. Cutting is equally impressive for a Diode laser (up to 5mm of wood if you value your time) it can cut 10mm.
- The button on the front of the machine can be utilised as an emergency stop (believe me I know), this function only works whilst using XCS.
- The RA2 is a fabulous accessory, it’s versatile and metamorphic. The build quality and engineering are sublime and feel great in the hand. Maybe a keyless chuck could be designed for the next iteration of the RA3!
- The tool holder on the Xtool enclosure shows that some thought was taken when designing, a welcome addition.
- The focus lever on the Laser is a great addition and makes focusing a breeze (just remember to stow the lever before starting the job).
Conclusions
The xTool D1 Pro 20W is a professionally designed and engineered machine. The xTool D1 Pro 20W is a versatile machine capable of producing some of the finest laser details and cutting seen. I 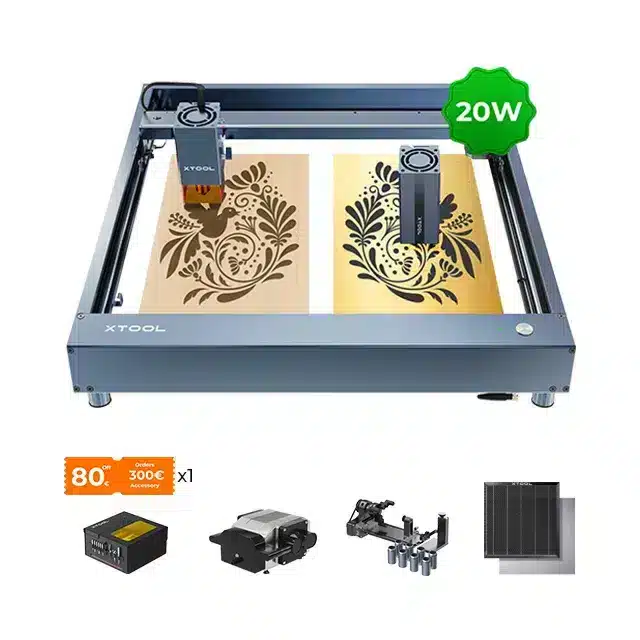 would strongly advise that you supplement the xTool D1 Pro with the xTool Enclosure and the xTool Air Assist, greatly enhancing the capability of the laser. Both are also essential for reducing the exposure of operators to smoke and fumes. The xTool Enclosure does reduce the operator’s noise exposure significantly. I would advise investing in a honeycomb base to prevent scorching on the rear of materials.
The xTool D1 20W stands head and shoulders above the poor-quality lasers on the market. Mr Jasen has invested a lot of time and effort to produce one of the best Diode lasers on the market. His dedication, effort and investment are evident in the quality of the xTool D1 Pro and its accessories. If you are looking for a crafting or small business laser, the xTool D1 is perfect. I can recommend the xTool D1 Pro 20W wholeheartedly.
Finally, please follow the enclosed safety advice and always protect your eyes from the laser light; reflections of the laser light can cause serious injury, be safe and not sorry.
Stephen
Remember, there is no such thing as mistakes, only happy accidents 🙂
Affiliate Links – EU
xTool Enclosure (Recommended)
Affiliate Links – USA
Makeblock xTool Smart Desktop Laser & Engraver: Laserbox Rotary
xTool Laserbox Rotary Productivity Kit-Premium
xTool D1 Pro 20W Productivity Kit – Advanced
xTool 1064nm Infrared Laser Module

